Big Data & Cloud Computing (CC4093)
Eduardo R. B. Marques, DCC/FCUP
This tutorial is a first introduction to the use of buckets and virtual machines in the Google Cloud Platform.
In the tutorial, we make use of the gsutil and gcloud command line utilities that are part of the Google Cloud SDK.
The SDK is pre-installed in the Cloud Shell virtual machine, so you can
just use Cloud Shell and the GCP console to go through the tutorial,
but you can install the SDK in your PC as well.
Throughout the semester we will make use of buckets to store data. Bucket are provided by the Google Cloud Storage service. For reference check the Cloud Storage service documentation.
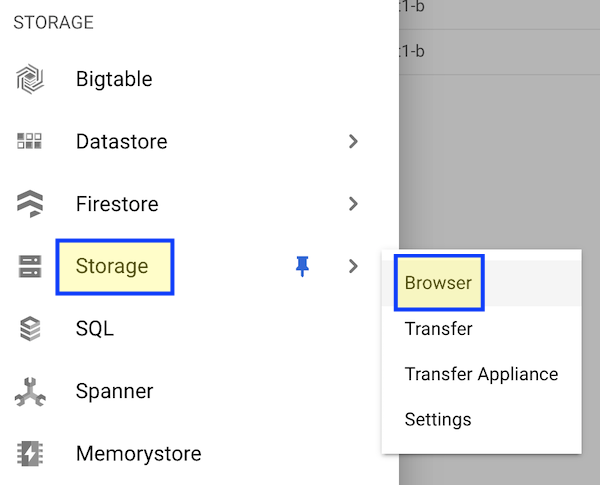
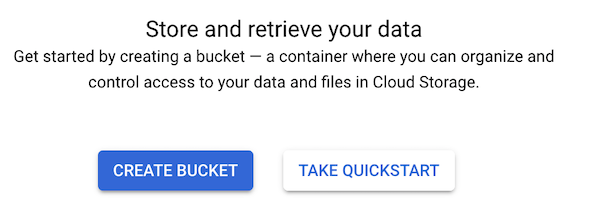
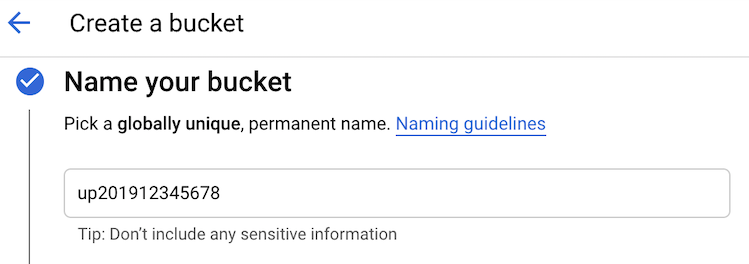
Step 1. Using the navigation menu in the Google Cloud Console, access Storage/Browser. Then click “Create Bucket” and configure the bucket parameters:
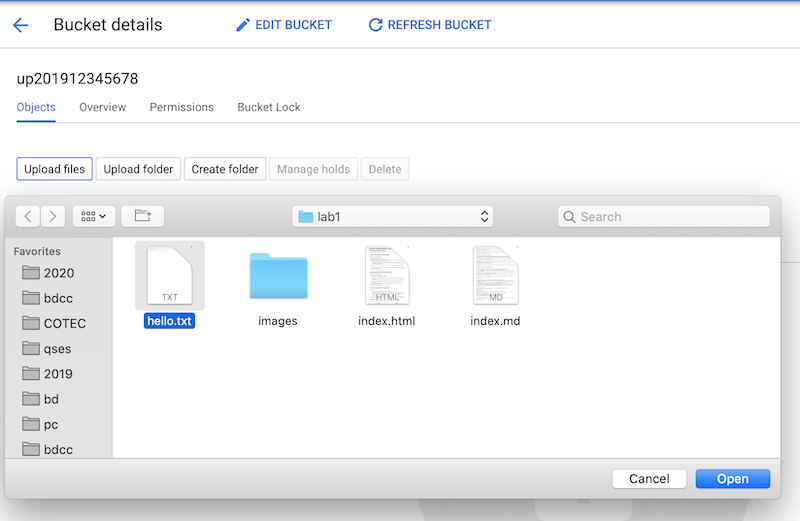
Step 2. Create a file in your PC named hello.txt with contents Hello world! and upload it to the bucket through the console.
Then access https://storage.cloud.google.com/bucket_name/hello.txt in your browser to check that the data is now accessible via HTTP. Hello world! should be displayed!.
(step 1)


(step 2)
gsutilgsutil is a program for bucket operations that is bundled with the Google Cloud SDK.
Open Google Cloud Shell and experiment the commands described below, replacing bucket_name with the name of the bucket you created previously. You can inspect the effects of each command in the console interface.
At home you can also check this tutorial: Quickstart: Using the gsutil tool.
gsutil help→ Displays a list of commands you can use with gsutil.
gsutil help ls→ Displays help for a particular command, in this case the ls command (see below). It works similarly for other commands.
gsutil ls→ Lists buckets available in the active project.
gsutil ls -l gs://bucket_name→ Lists the contents of bucket with given name.
gsutil cat gs://bucket_name/hello.txt→ Displays the contents of file hello.txt in bucket_name.
gsutil cp gs://bucket_name/hello.txt hello2.txt→ Copies hello.txt from bucket_name to local file hello2.txt.
gsutil cp hello2.txt gs://bucket_name→ Copies local file hello2.txt to bucket_name.
gsutil cp gs://bucket_name/hello.txt gs://bucket_name/hello3.txt→ Copies hello.txt from bucket_name to hello3.txt in the same bucket (a different bucket could also be used).
gsutil rm gs://bucket_name/hello2.txt→ Removes hello2.txt from bucket_name.
gsutil mb gs://bucket_name_new→ Create a new bucket called bucket_name_new.
gsutil cp gs://bucket_name/hello.txt gs://bucket_name_new/hello.txt→ Copies hello.txt in bucket_name to bucket_name_new.
gsutil rm -r gs://bucket_name_new→ Removes bucket_name_new and all its contents.
This is a first introduction to Compute Engine, a Google Cloud service that lets you create, run, and manage virtual machines. For further reference consult the Compute Engine documentation on VM instances.
Step 1. In the GCP console access Compute Engine/VM Instances.
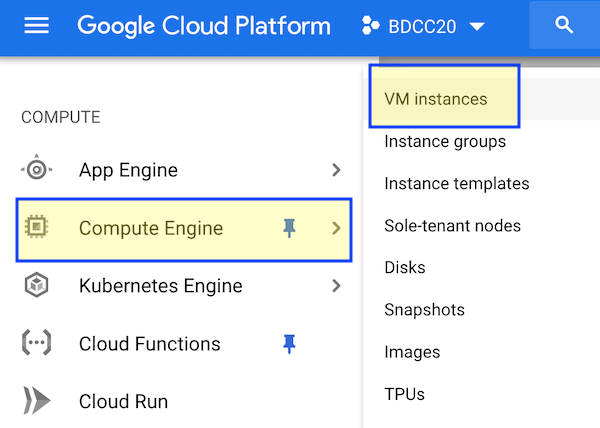
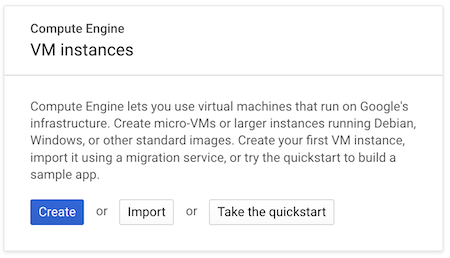
Step 2. Click “Create”, then (as shown below):
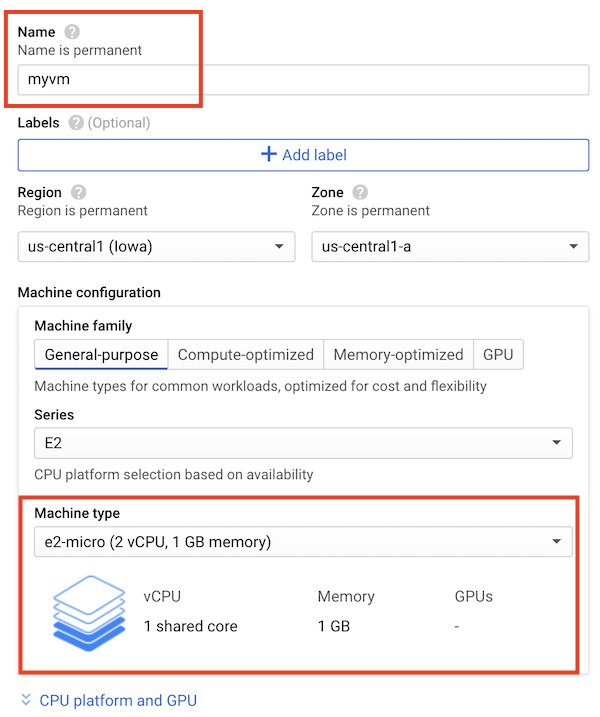
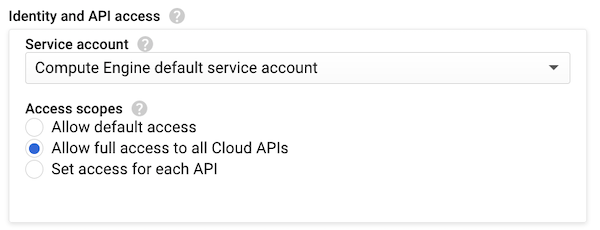
Step 3. In the Access Scopes also enable the Allow full access to All Cloud APIs. This will let you access all APIs from within the VM, for instance the gsutil utility.
Step 4. Finally click Create to create the VM.

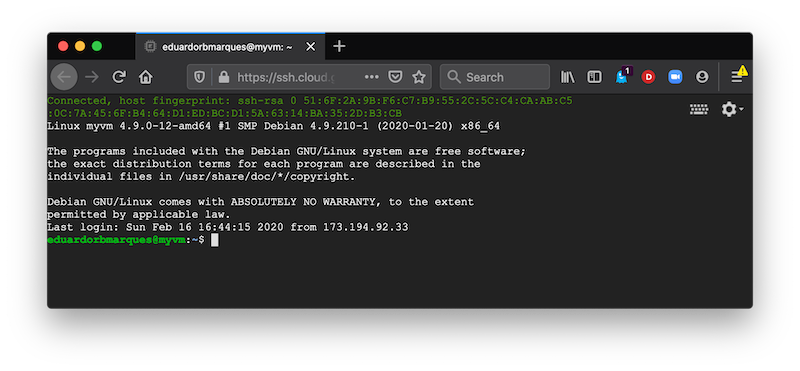
Once the VM is created, in the Compute Engine dashboard access SSH/Open in browser window to open a command-line window to run commands inside the VM.
 .
.
gcloud commandIn the Google Cloud Shell you can use the gcloud command to access and control VMs.
gcloud compute -hgcloud compute instances listYou should see something like:
NAME: myvm
ZONE: us-central1-a
MACHINE_TYPE: e2-micro
PREEMPTIBLE:
INTERNAL_IP: 10.128.0.2
EXTERNAL_IP: 35.193.71.208
STATUS: RUNNINGgcloud compute ssh myvm Open a new tab in the Google Cloud Shell then edit a file named hello.txt for instance, and copy it to the VM:
echo Hello > hello.txt
gcloud compute scp hello.txt myvm:
→ File hello.txt should afterwards exist on the VM disk.
gcloud compute scp myvm:hello.txt hello-from-vm.txt→ File hello-from-vm.txt should afterwards exist on the Cloud Shell host.
gcloud compute instances stop myvmgcloud compute instances start myvmYou can check if it is active executing again:
gcloud compute instances list Turn off the VM when you are done using it to avoid unnecessary credit charges.
You can do it using gcloud as illustrated above or through the Compute Engine console.